Monday, March 30, 2009
Tiny beaded purse charms
Here are two beaded purse
charms I made recently.
They are very tiny, made with size 11 beads.
They are made using the Peyote even-count stitch.
Before closing and sewing
them shut, I put a small
piece of plastic that I
recycled from a plastic box that held some Christmas tree lights.
The plastic is slightly rigid, so I rolled it into
a log-like piece and placed a small amount
of stuffing in it to make the purse a little more solid.
The picture with the quarter shows just
how small the charms are.
Butterfly Brooch -- Flower Brooch
Here is some bead embroidery I've been doing. I bought some fabric called Buckrum, and embroidered with beads after sketching an image. They are pretty quick to make, I usually sit and listen to TV while I do it.
On the back I am going to glue a piece of felt and a pin, so I can wear it on my jacket.
You could also use these to sew onto quilts, wall hangings, or glue them to a chopstick and use them as plant pokes.
On the butterfly, I used transparent beads and on the flower, I used opaque beads.
These were my first attempts. Next time I will color in the corresponding colors on the buckrum, such as green on the leaves, before I bead them. That way you won't see the white buckrum between the beads.
Saturday, March 7, 2009
Flag Bottle Cap Hot Pad
I've been saving the metal bottle caps that come off of bottled beer and some soda pops. I then decide upon a pattern, and colors. The next step is to make yo-yo's that will cover the bottle caps.
I cover each one and then tack them together by sewing them on the sides that touch each other.
I then cut a piece of felt to cover the bottom to give the table extra protection and give a finished
look to the hot pad. I have plans for an
apple, orange, pumpkin, grapes and many more.
Friday, March 6, 2009
Gnome Tree
A few years ago, I found a cutting board that reminded me of a door. So I added hinges, a door knob and a flag, placed a piece of metal in the handle opening for a window, and placed it in the indent of a tree. It's glued there with wood glue, and appears like the "door" was made exactly for that spot!!!
I also bought a couple of gnomes from the dollar store and made a birdbath out of a small terra cotta pot. My grandchildren were fascinated by the little area and I was forever looking for the gnomes and other things. Usually I found them in the sand box!!! I do take the removable things in each winter, but the door stays out year round. This year I need to repaint the flag, but the door has held up very well!
Tuesday, March 3, 2009
Crayons and Embroidery is a great fit!
I saw in an old craft book that a long time ago, women used wax crayons to color the pictures they'd drawn on fabric, (I used muslin), then they would iron the fabric and add embroidery stitches for contrast. I found some iron-on pictures, but copied them through a light box instead of ironing them on. This is one (above) that is destined to become a small bed pillow.
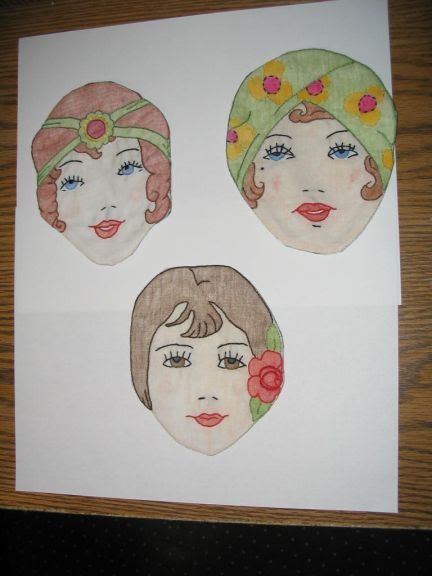
I also used this method to make coasters for a swap I was in on a craft forum. Each woman's head is a separate coaster.
These are a lot of fun to do, because it's like being a kid again, coloring, but when you get to embroider its doing a favorite craft!!!! LOL!
Just remember to iron them with a piece of parchment paper between the crayon and the iron, so you don't ruin your iron!
Monday, March 2, 2009
Easter Teapot
I bought the teapot for 25 cents at a garage sale, and it looked like this before I painted it.
Since Easter is rapidly arriving, I thought I would share the teapot that I painted for an Easter Swap I had with a member of a Craft Forum that I belong to. I glued buttons on for the flowers, dragonflies and bees, and added a prim bunny cookie cutter to the handle which I had wound with tea-stained fabric.
Here is the sides and ends of the teapot. It was for a woman that liked prim things, so it is made in that way.
I found some buttons that looked like hearts and flowers to attach to the teapot. I also crackled the lid's handle.
Subscribe to:
Posts (Atom)